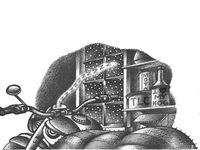
The riding season is over. If you live in a place that sees snow after Halloween, the riding season is history, unless you got really lucky this year. In another few weeks, much of the rest of the country will also be struggling to live without motorcycling until spring.
Lots of motorcycle shops profit every spring from motorcycle owners' failure to properly prepare their machines for a season of inactivity. The following list presents the items you should attend to in order of importance, though you will have to perform them in a different order if you choose to do them all.
While you are completing these tasks, keep a to-do list of changes, repairs, adjustments, etc., you want to make before next season starts. Put it in a place where you will see it and be reminded before spring rolls around and it's time to ride again.
The most important, and perhaps easiest, task to attend to is draining the fuel from the carburetors. If your bike has a petcock, turn it to off, then loosen the float-bowl drain screw or bolt, and drain the fuel in the bowl into a safe container. If the drain is inaccessible or nonexistent, remove the float bowl from the carb. If you can't do that, run the bike with the fuel turned off until the engine stops.
This procedure—which should be done any time the bike won't be used for more than two weeks—is the best preventive medicine for a bike that will be stored. It not only removes water and other contaminants from the bike's carbs, it prevents the various orifices of the carbs from getting clogged or restricted with varnish as the more volatile components of the gasoline evaporate. This latter problem sends many motorcyclists to their dealers every spring, and the fix is often very expensive.
If your bike is fuel-injected, draining the systems isn't possible. In that case, be absolutely sure to fill the fuel tank and use a fuel stabilizer as discussed below.
During storage, unprotected fuel tanks rust, and when you start riding again, that rust finds its way into the carbs. Water in the fuel can also cause corrosion. For most riders, especially with a carbureted motorcycle, the best course of action is to drain the tank completely to remove any water or other contaminants, then refill the tank to its full capacity adding a fuel stabilizer recommended by the bike's manufacturer. Honda sells its own brand under the Hondaline label. Sta-Bil should be fine if there is no recommendation.
If you are riding to a gas station to fill the tank. put the stabilizer in before you add gas. The turbulence of the incoming fuel and the ride home will help to mix it.
The stabilizer keeps the fuel from stratifying. If you don't use one, the heavier elements in the fuel will be the first into your bike's carbs next spring—which will wreak all sorts of havoc. It's still a good idea to drain the fuel again in the spring before starting the bike or even turning the petcock on (put the gas in a car). This is essential if you don't use a stabilizer. However, there are those who say that using a fuel stabilizer means that you don't need to drain the float bowl because the stuff is so effective. They might be right.
If storing a full tank of fuel all winter presents a problem, turn the petcock off and pour some heavy (50-weight or thicker) oil into the empty tank (some people thin it with fuel) and slosh it around so all the interior surfaces are coated. Turn the petcock on and drain the excess oil, and then turn it off. Since your tank is off, you might as well leave it off and repeat the sloshing process every few weeks. Before you fill the tank in the spring, drain the oil that has settled again. The small amount of oil that remains after that probably won't even make your bike smoke, and it might give the top end a little lube during that first ride.
Batteries don't like inactivity. A battery ignored all winter will usually roll over and die. The simplest way to ensure a happy off-season for your battery is to connect a battery charger to it. You don't even need to remove it from the bike unless it gets well below freezing where you store it or if your bike has a clock, audio-system memory, security system, or another constant drain on the battery.
If you have a maintenance-free battery, simply clean the terminals and any serious grunge off the battery and battery box and spray a little silicone spray or another protectant on the terminals and connecting hardware. If it's one that requires fluid to be added, fill it to the top-level before storage.
If you ignore your battery and leave it where it can freeze, it may do so, and crack the case, allowing acid to spill on the bike. If even a drop gets on the chain, it can be rendered worthless.
Ignore the persistent old wives tail about batteries dying if they are stored on concrete.
If your battery does die during the winter, replace it during the spring. Don’t try to charge it because it’s past the point of being recharged.
Clean your bike carefully before storing it. Dirt and dust hold moisture, and insects' butts (the last thing that went through their minds when they hit your bike) are corrosive and will damage paint and metal. Road salt is also bad news. If you wash it, make sure it is thoroughly dry. A good way to dry out all the hidden nooks is a long, spirited ride.
Apply wax to every painted part you can reach, but you don't need to buff all the wax off until spring. Wax or a chrome polish will protect chrome. Coat other metal parts with S100 Corrosion Protectant (which lives up to its name), Maxima's Chain Wax, or LPS3. Fasteners and other small pieces can be coated with Vaseline.
Exhaust pipes will rust out if moisture gathers in them, so spraying something like WD40, LPS3, or Corrosion Protectant up in them is definitely worthwhile. If you cap them, wait until they are cold and cover them with a balloon or plastic bag held on by a bubber band. If you have straight pipes, condoms will work, and the novelty will give you a conversation piece to help pass those long winter months.
If you decide to take the following steps to protect your engine, they are the first things you should do chronologically—since you can't drain the carbs, for example, until you have run the engine.
Some people like to change the oil in the spring since some water will get into the engine during storage. That's true, but the water will be boiled off the first time you take the bike for an extended ride. Better to drain the old oil—and the contaminants in it—now, before the acids and other evil compounds can work on your bike's engine. Take the bike for a nice long ride in preparation, to get the oil warm, and drain it promptly upon your return. Change the filter, too. After adding the new oil, ride it around the block to be sure the fresh oil has diluted any remaining contaminants and coated everything. If you plan to change the oil you just poured in come spring, then use the cheapest oil you can find right now, perhaps a heavier grade than you normally use.
Some riders like to protect the cylinders by removing the spark plugs and pumping a very small amount (no more than a tablespoon) of that heavy oil used for the fuel tank into the cylinders, then turning the engine over (put it in gear with the plugs out and the ignition turned off and turn the rear wheel) a few times to spread the oil over the cylinder walls before replacing the plugs. This is worthwhile. An alternative system is to use fogging oil (we have found it in boat-supply stores), which is sprayed into the intake with the engine running. You simply do it until the oil fouls the spark plugs and kills the engine. If your intake is not accessible, you can spray it into the spark plug holes. It coats the cylinders and valves. Another method for preventing interior corrosion is to use storage plugs in the spark plug holes. These contain a desiccant to absorb moisture. Some riders run their bikes or turn the engines over during storage. If you want to turn it over without starting, repeat the oil-in-the-plug-holes routine when you do. Running it without riding for 20 minutes or more probably does more harm than good.
If you have the valve covers off, put a shot of that 50-weight on the cam lobes or rockers. Some riders like to seal off the intake and exhaust. Tape a plastic bag or something similar over the airbox and plug the exhaust. Note, however, that the exhaust has water drains on most bikes, and the engine still has a breather. You can plug or tape these up as long as you are sure to remove the covers before starting.
Once the engine is shut off and properly protected from corrosion, resist the urge to start it, though turning it over manually to circulate oil is worthwhile.
Brake fluid absorbs water, which is why it should be changed. Do this at least every other year—sooner if it has changed from its normal amber hue to a darker color. This also applies to hydraulically operated clutches. Water in the fluid can prevent clutch disengagement when the engine is hot.
Some sources recommend changing the brake fluid when you prepare to store the bike to prevent any moisture in the system from corroding the components. Others say you should change it when you prepare to put the bike back on the road to assure maximum braking performance during the riding season. Either way, be sure old brake fluid gets changed.
Owners of liquid-cooled bikes that are stored where the temperature drops below freezing should check that the coolant is up to snuff to avoid freezing damage.
Store tires away from sources of ozone, such as the electric motors in freezers, compressors, or washing machines.
Try to get your bike blocked up off its wheels, which will prevent the tires from developing flat spots. A work stand is ideal for this. If you don't get them off the floor roll the bike or rotate the tires every few weeks. You can Inflate the tires to or past their recommend maximum pressures as well.
Many of the so-called tire-preservative solutions actually damage tires; it's better to use nothing. If your tires are getting thin in the tread, consider removing the wheels and having the tires replaced at your leisure, perhaps when the local shop has its mid-winter special.
This is a good time to replace the lubricants in any moving part: cables, chain, control levers, driveshaft, linkages, locks, pivots for the stand, saddle hinges, steering head, swingarm, switches, wheel bearings, etc.
You'll need a variety of lubricants ranging from wheel-bearing grease to WD-40 for the various components. Work the pieces as you apply the lube to get it into the mechanism.
If you are storing your bike for more than four or five months, you should change the oil in your driveshaft or transmission.
Store your bike in a place that is dry and free of significant temperature swings. If you are storing your bike inside, use a breathable fabric cover, one that won't trap moisture but still keeps dust off. An old sheet will suffice, but is not ideal like some of these motorcycle covers.
If you must store your bike outside, there are purpose-built storage systems that seal out moisture and dust and use a desiccant or electric dehumidifier to keep it dry, but it's better to rent a spot in a nice warm, heated garage, preferably a private one away from covetous eyes.
With your bike put into hibernation, you have taken the first step to assure a happy riding season next year. Your to-do list and any additions or mods will complete the process. As you perform the various storage procedures, consider what needs to be adjusted, serviced or replaced. If it needs tires, they may be cheaper during the winter. Fluid in the radiator, fork or other systems might be ready to be freshened. You may notice anything from brake pads to shift levers that are due for replacement. Valves are supposed to be adjusted with the engine cold, and it probably won't be much colder than in February.
- Step 1: Drain the carbs, if you have any
- Step 2: Fill your fuel tank and put fuel stabilizer in the fuel
- Step 3: Hook up your battery to a charger, or take it inside and charge it during the winter
- Step 4: Clean and wax your motorcycle to get all of the paint destroying crud off of it
- Step 5: Ensure that your engine will not rust by keeping it lubricated
- Step 6: Change your oil if you need to
- Step 7: Change your brake fluid and check your pads
- Step 8: Check and change your coolant if you need to
- Step 9: Either get your bike up on some stands or roll it around the garage every few weeks
- Step 10: Change your tires if you need to
- Step 11: Lubricate any moving part
- Step 12: Cover your bike to keep dust from working itself into the paint
- Step 13: Complete any item on your to-do list that you made
- Step 14: Wait for spring and for it to be warm enough to ride


/cloudfront-us-east-1.images.arcpublishing.com/octane/H6Z2IC7WYRBXZNQS4MI3SZ5KPQ.jpg)
/cloudfront-us-east-1.images.arcpublishing.com/octane/IWO5T5PBT5E4HFQ5GK47H5YXR4.jpg)
/cloudfront-us-east-1.images.arcpublishing.com/octane/OQVCJOABCFC5NBEF2KIGRCV3XA.jpg)
/cloudfront-us-east-1.images.arcpublishing.com/octane/F3O2DGLA4ZBDJGNVV6T2IUTWK4.jpg)
/cloudfront-us-east-1.images.arcpublishing.com/octane/ZXYQE3MHLFDSPKNGWL7ER5WJ4U.jpg)
/cloudfront-us-east-1.images.arcpublishing.com/octane/RDF24VM7WVCOBPIR3V3R4KS63U.jpg)
/cloudfront-us-east-1.images.arcpublishing.com/octane/W7RSIBFISNHJLIJESSWTEBTZRQ.jpg)
/cloudfront-us-east-1.images.arcpublishing.com/octane/AERA26ENRNBW3K324YWCPEXYKM.jpg)
/cloudfront-us-east-1.images.arcpublishing.com/octane/YWX3YX7QBBHFXFDMEEEKRG4XJE.jpg)
/cloudfront-us-east-1.images.arcpublishing.com/octane/I7OKI53SZNDOBD2QPXV5VW4AR4.jpg)
/cloudfront-us-east-1.images.arcpublishing.com/octane/IH52EK3ZYZEDRD3HI3QAYOQOQY.jpg)
/cloudfront-us-east-1.images.arcpublishing.com/octane/K2FSAN7OWNAXRJBY32DMVINA44.jpg)
/cloudfront-us-east-1.images.arcpublishing.com/octane/G4XK7JL24FCUTKLZWUFVXOSOGE.jpg)
/cloudfront-us-east-1.images.arcpublishing.com/octane/JJNXVAC27ZCDDCMTHTQZTHO55Y.jpg)


